So... Today didn't go as planned.
Generally, if I'm going to craft, it happens when Logan is asleep. Because really? Toddler + crafting, need I say more?
So I had planned to do the last couple steps of these yarn balls during his nap today. But then of course, Logan had a different plan and decided he would rather take a header out of his crib instead of a nap. Which meant that (long story short) he didn't end up getting a nap today. And Tyson and I were just talking about how good he was to not try and climb out of his crib, ha! Clearly we failed to knock on wood.
So my craft plan sorta fell apart and I didn't get to display them the way I wanted to but they are done.
And my nails are chipping which has severely decreased my mojo. Perhaps like Samson and his hair?
Anyway, on to the tutorial!
First you need some balloons. I wanted different sized balls so I got the big punch balloons, some 12 inch and some 7 inch latex ones.
These are the punch balls. It took me about 2 seconds to realize we needed the pump to blow these up. On the other hand it took us about 10 minutes to tie the end off according to their directions.
Next you'll want to gather the yarn you'd like to use and make your paper mache.
I used the same recipe that Key to Flow used which is:
Mix 2 cups water and 1/2 cup flour in a bowl.
Stir to reduce lumps.
Boil 2 cups water in a saucepan then add the water/flour mixture and bring to a boil again.
Remove from heat and add 3 tablespoons sugar.
Let cool.
I made 5 yarn balls and I used every last drop of the paste.
Dip your yarn into the paste and let it get really saturated. You'll need to find a good method for you to pull the extra paste off the yarn and wrap it around the balloon.
No matter what you do though you will feel like Gawky McAwkwardness.
It's a little tricky and super messy. But do the best you can to wrap the yarn around the balloon.
It really is easier if you put lots of yarn in the paste, then strip off the extra and have a bunch of wet yarn laid out to wrap around the balloon.
Once you've got the balloon wrapped the way you want it, ask your husband to cut the yarn since your hands are covered in goop, then rig up a drying station.
Oops, a drying station in a place where your child can't play punching bag with all your hard work.
When the yarn is dry (at least a 24 hour wait) you'll need to work the yarn off the balloon before slowly deflating it.
It was approximately a billion times harder to get the yarn off the punch balls than off the regular balloons. I had no idea. It was the difference between pulling each string off individually vs. just tapping the balloon to release several strings at once.
But I wanted that big round ball look and if I've learned anything during my crafting phase of life, it's that it's totally worth extra effort to get what you really want. Don't waste your time doing something you're not gonna like as much.
And here they are! I have plans to hang them but I haven't been able to yet. I'll show you when I do!
Extra bonus, you've got your wart balloons already done for Halloween!
'Cause that's totally a thing.
The skinny: This craft was messy. But once I got a rhythm going I was able to crank out the goop covered balloons pretty fast. I probably wouldn't do this again but I admit my mind has been churning with other ideas for paper mache. I am 90% sure I'll be making a pinata for Logan's 3rd birthday. I'm not ready to deal with that this year.
Plus again, and you know I love this, it was a cheap project. All I had to buy were the balloons and I was planning on getting some for Logan's birthday anyway. Definitely worth trying once.
---------------------------------------
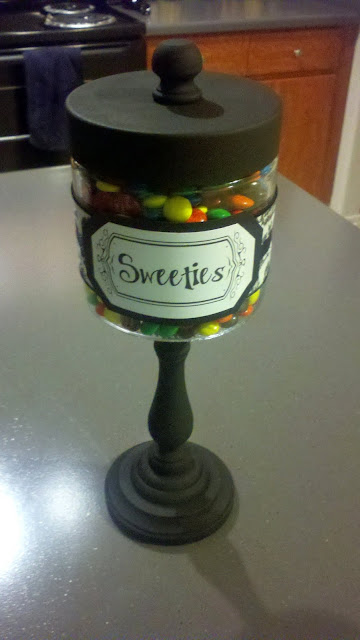
We've got another project to show! Another one of my darling cousins, Amy, made this adorable pinterest inspired candy jar.
Isn't it cute!? I want her to make me one!


I wonder if coating the balloon with cornstarch first would help the yarn not stick to the balloon? (or just add mess?)
ReplyDeleteI am SO glad you did this. I wanna get some yarn and do little balls to hang above the 'new' baby's bed. I wonder if smaller balloons/balls would be easier than the big ones. Oh and I wanna know what you did with them!! :)
ReplyDeleteCornstarch! That is a really good idea.
ReplyDeleteAnd Jess I do think smaller balloons would be easier. The smallest one I did was the easiest for sure. You should powder it with cornstarch first and let us know how it goes. :)
LOVE THEM!!! :)
ReplyDeleteIll be adding butterfly lights and hanging them as a weddung decoration
ReplyDelete