I made something!!! Are you so impressed? It's been awhile.
Naturally when I found out that my baby is a girl, my pinterest account exploded with ideas for her. Apparently I was repressing some deep seated (ok, probably not that deep) desire to decorate with feminine frilly things.
Anyway, when I saw this wax paper chandelier from Freshly Picked I had to have it, in a mini version, for her bedroom.
Immediately.
But then I got tired and hungry so immediately turned into three weeks and... well, that's what happens when you're pregnant.
But it's finally done!
If you want to see details of how to make your own you can check out Freshly Picked because she does a good job explaining what to do.
Lemme just give you some advice.
Don't use this hole punch.
Seriously.
Unless you want to hole punch your face in trying to make it work. I'm sure it's fine for regular paper, but for wax paper it is horrible.
It's possible I chucked it across the room at one point.
It's also possible that I discovered that the more pressure I used the better it worked. So after feeling like I broke a knuckle trying to repeatedly slam it down with both hands, I switched to stomping pressing down on it with my foot.
5 seconds later it broke.
Many pseudo-curse words were uttered.
And one real curse word.
Kidding.
Ahem... So I went out to buy a new hole punch. This one.
Saved the day. And my sanity.
I did do a couple other things different too; instead of taking apart a lampshade I came across a couple metal rings for cheap so I picked those up instead. Then I wrapped them in white ribbon and yarn to cover the gold.
I also took apart this mini chandelier that I found on the cheap for the hardware to attach the rings together.
And thus the base of my chandelier was born.
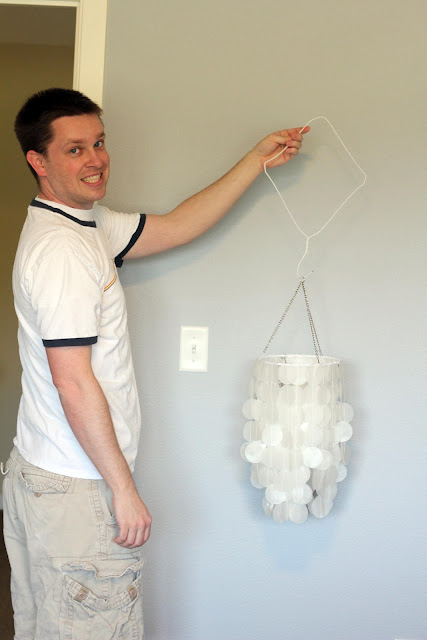
I ironed sheets of wax paper together and sewed them in strips of circles, just like in the tutorial. What I did was a strip of 11 and then I draped it over the ring with 5 on the outside and 6 on the inside so that I could get a tiered effect.
Many many rounds of ironing wax paper, cutting circles, and sewing later I had my finished product!
I'm going to hang it as a mobile over her crib so I decided not to put a light inside.
And naturally I couldn't let the crystals from my other chandelier go to waste so I hung a few of those throughout with some fishing line.
To give you an idea of how big it is and to include a shot of my man who held this in 4 different places so I could find the lighting I wanted.
I can't wait to put her bedroom together so I can hang this above her crib!


Oh wow, I really like it!! VERY cute and delicate. I'd like to hang a mobile in my boy's room but I need to find one that's not too girly. :)
ReplyDeleteADORABLE!!! :)
ReplyDeleteThat is so beautiful! Good job! I tell you it's so fun to have a girl (I do have 2 boys and they are fun too, but just different, you know?. I'm so excited for you. Have fun decorating the girl's room!
ReplyDelete